")


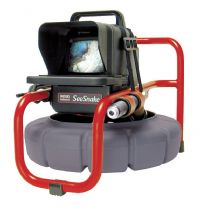
Ridgid SeeSnake Camera Repair Service
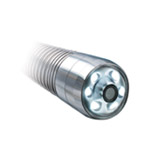 Camera systems can require repair, as when in use, the reels can be bent or damaged during progress through the pipe inspection. Camera heads being bent over or broken is not a common occurrence, but if this does happen. Instead of having to purchase a new cable we can repair the existing camera head and cable for a fraction of the price. We offer a collection and return delivery service nationwide or you can drop into our Kettering Workshop for investigation and repair. Repairs are carried out for REMS and Rothenberger cameras as well as the Ridgid Seesnake, MicroReel, MINPAK and NatrTrack Scout repair or there is a calibration service offered when required.
  We can interface Ridgid reels and equipment with other manufacturers including REMS and Rothenberger base / control units. Our warehouse stock spares and consumables such as bulbs, lamps, glass etc for manufacturers as follows including the repair of the camera cables :
- Ridgid
- REMS
- Rothenberger
- Prokasro
- Vivax
- Seesnake
- Minicam
- Crusade
- Pearpoint
- Gatercam
- Telespec
- Scanprobe
Operating Instructions for Ridgid SeeSnake Interface Box
The interface box should be used with the lead that was supplied with it as this is part of the configuration and plugging into a different type of main control box may cause damage to the electronics inside the interface.
The counter reset function will not work on earlier SeeSnake counters that have a minimum count of 0.5m (or 1 foot). Setting up the system:
Make sure the power of the host control box is turned off.
Ensure that the cable of the SeeSnake is fully wound into the reel.
Connect the SeeSnake to the interface.
Connect the interface to the host controller with the lead supplied.
Turn the LED brightness control knob on the interface fully clockwise (maximum brightness).
Turn on the power of the host unit. The red LED on the interface should be lit, if it is not check that the interface lead is connected properly.
Press and hold the counter reset button (GREEN) on the interface box for approximately 2 seconds until the white LEDs on the front of the camera flash.
This sets the counter to zero and calibrates the reel. Using the Meterage Counter Place the camera into the pipe at the start point of the survey and adjust the lighting control if necessary.
Press and hold the counter reset button again, this zeroes the main and relative counters in the SeeSnake.
Start the survey. If the counter needs to be zeroed at an intermediate point in the survey (e.g. when passing through a manhole, for instance) a press on the reset (GREEN) button will switch between the main counter and the ‘relative’ counter.
The relative counter is displayed inside square brackets and will indicate zero [000.0].
Continue with the survey and the counter will increment.
Another press on the reset button will switch back to the main counter, which will indicate the total distance from the start point.
Pressing on the reset button again will switch back to the relative counter, but will also ZERO it.
A long press (more than 2 seconds) on the reset button will reset both the main and relative counters and display the main counter.
Activating the Transmitter Turn the LED brightness control fully clockwise (full on) Push the transmitter on/off button (RED).
The red LED on the interface will start to pulse on and off and some interference will usually be observed on the screen.
The transmitter is now active. To turn the transmitter off again, push the transmitter button.
The red LED will be permanently lit and the picture interference, if any, will stop.
The LED brightness control needs to be fully up to give maximum power to the transmitter.
If the control is turned down, the depth at which the transmitter can be detected will be reduced.